Blended Products for WooCommerce
Blended Products for WooCommerce
Blended Products for WooCommerce by eCreations gives your customers the ability to combine simple products like coffee, tea, or essential oils into a custom blend. Once a blend is created, it can easily be added to the shopping cart.
Customers’ blended products appear on their account page, where they can reorder it whenever they want. It does not appear in the main shop or category pages, but if your customer wants to send the link of their custom product to their friends, they can.
You can also enable Blended Products for WooCommerce to work with Subscriptions! If that feature is enabled, when a new custom blend is created a new subscription product is generated at the same time. It will be added as a related product.
As a verified Woo Expert, we wrote this WooCommerce extension because there wasn’t anything out there. It is different than composite products; it’s different than mix-and-match. The Blended Products for WooCommerce specifically allows customers to blend already created WooCommerce simple products for their very own custom blend.
Requirements
Setup
The User Experience
Requirements
- PHP 7.1 or above
- WordPress 5.3 or above
- WooCommerce 3.93 or above
- If using with subscriptions, WooCommerce Subscriptions 3.0.1 or above
Setup
Setup is easy!
Once you configure your settings and add the shortcode to a page on your site, the plugin will do the rest. It creates the custom blend products automatically when a new combination is created, creates a subscription product if that functionality is enabled, and associates each customer’s blends with their account.
- Once the plugin has been installed and activated, go to the settings page: WooCommerce > Custom Blends
- Product Category: On the settings page, select a product category. Blended Products will be enabled for the products in this category only.

- Products to Exclude: Once you select the category, all of its products will display below. You can keep Blended Products from being enabled on individual items here. Just select any products you wish to exclude.
- Page Blender Will Appear On: The interface where customers can blend their products will appear on one page on your website. Select it from the dropdown. You will also need to add the shortcode [wcblendit] to that page.
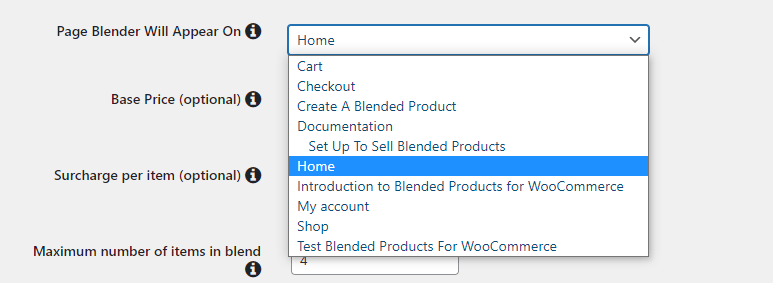
- Base Price: If you wish to charge a base price for custom blends, to cover the expense of mixing products and packaging them, you can enter the amount here. The cost of the products will be added on top of this base price.
- Surcharge Per Item: If you wish to charge a fee for each item added to a blend on top of the cost for the product, you can set it here. This can be used to cover expenses incurred from mixing a large number of products to make a blended product.
- Maximum Number of Items In Blend: If you wish to set a cap on the number of items that can be blended together, enter that quantity here.
- Create Subscription Product From Custom Blend? If you are using WooCommerce Subscriptions on your website, you have the option to let your customers order their custom product as a subscription. Once you click the select box, other subscription options will appear below.
Subscription Frequency Settings:
The fields that set the information for subscription frequency may be a little confusing at first glance. They were designed to add the same information to newly-created Blended Products that WooCommerce Subscriptions has included as part of the price when you create a new Subscription product. In the image below, next to the text “Subscription price($)”, there is a price field and then 2 dropdowns. In WooCommerce Subscriptions, the shop owner manually sets the price for each subscription based on how often the customer wants to receive the product.In Blended Products for WooCommerce, you set the subscription frequency and it’s applied for all of the custom blends. The price is calculated based on the price of the individual item and charged each time the subscription renews.
- Create Label For Subscription Intervals: This displays on the product page, next to the dropdown where customers can choose how often they want their subscription to renew. If you already have this set up as a product attribute, you can select Predefined. Otherwise, you can create a Custom Attribute.
- Label: This is the label that appears next to the dropdown menu where the customer chooses how often to get their order shipped to them. ‘Ship Every’ or similar text works well.

- Allowed Subscription Intervals: This is for the subscription frequency. When a customer purchases the custom blend as a subscription, they should be given different frequency options to choose from. The first field is for the text that will display for the option, for example if the subscription renews on a weekly basis the text will be ‘Weekly’. The second field sets how often the period renews. Options are ‘every’, ‘every second’, ‘every third’, and so on. The third field is the unit of time: Day, Week, Month, or Year. Once you’ve entered the information in all 3 of the fields, click Add Subscription Interval and it will appear in the area below the line.
- Save Changes: Once all your settings are good, click the button to save them.
The User Experience
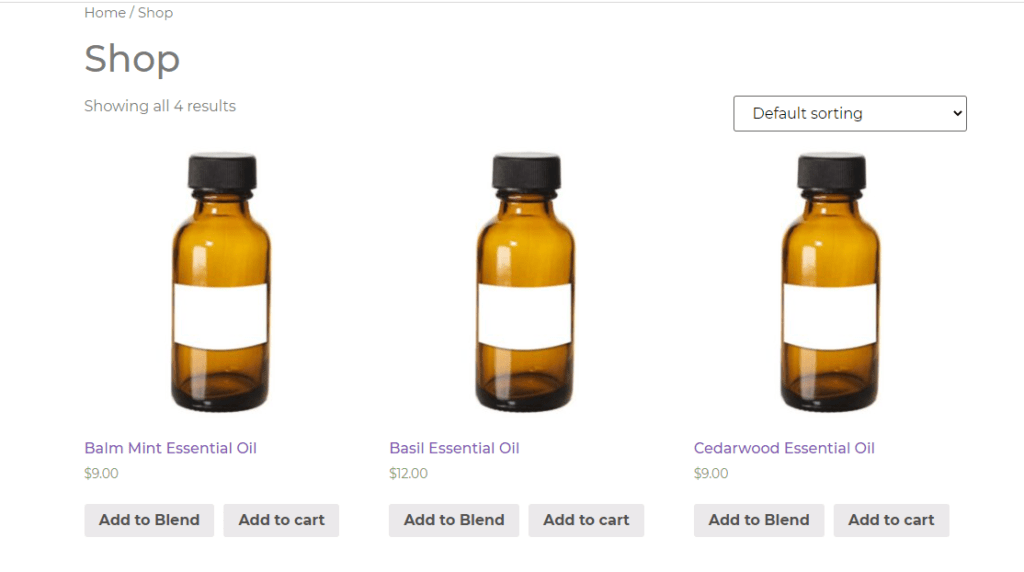
When viewed on the shop page on the front end of the website, products that can be added to a blended product will have a second button next to the ‘Add To Cart’ button. This one will be titled ‘Add to Blend’.
The Product Blender Page:
When the user clicks on the Add To Blend button, they will be redirected to the blender page.
The item they clicked on will already be selected on the blender.
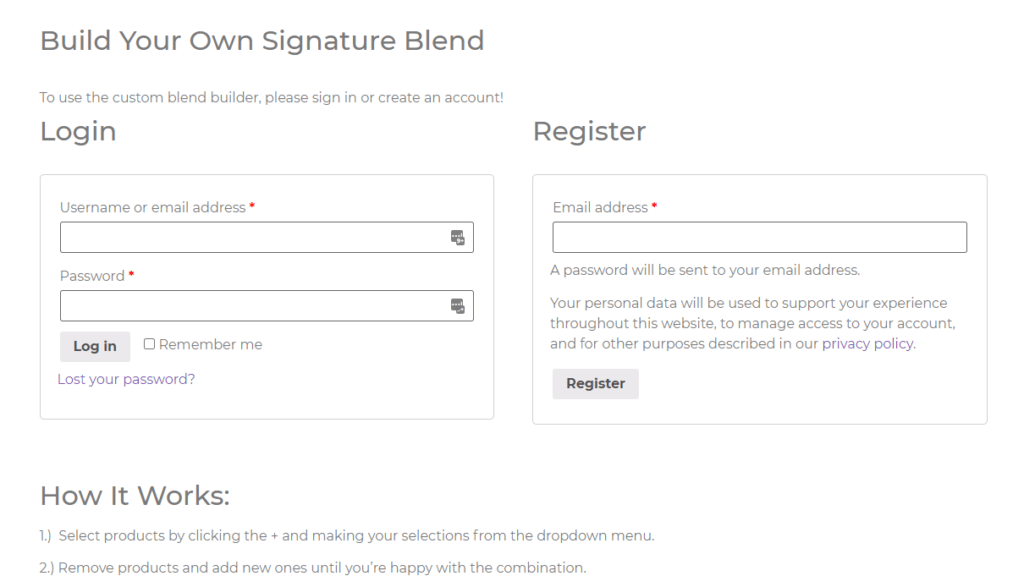
To build their own unique product, customers are required to have an account. If they don’t have an account or aren’t logged in, a login / registration form will appear instead of the blender interface.
Add Ingredients To The Blend:
To add another product to the blend, the user clicks on the box with the text ‘Add Product To Blend’.
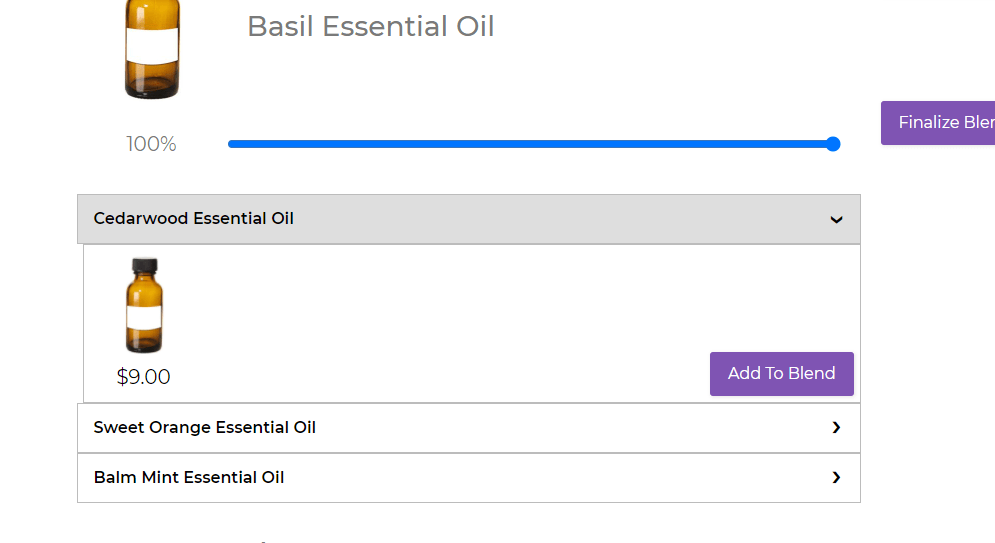
A modal window appears with a menu listing all of the available products. Clicking on any of the arrows reveals the details for that product, along with an Add To Blend button.
Adjust Ingredient Amounts:
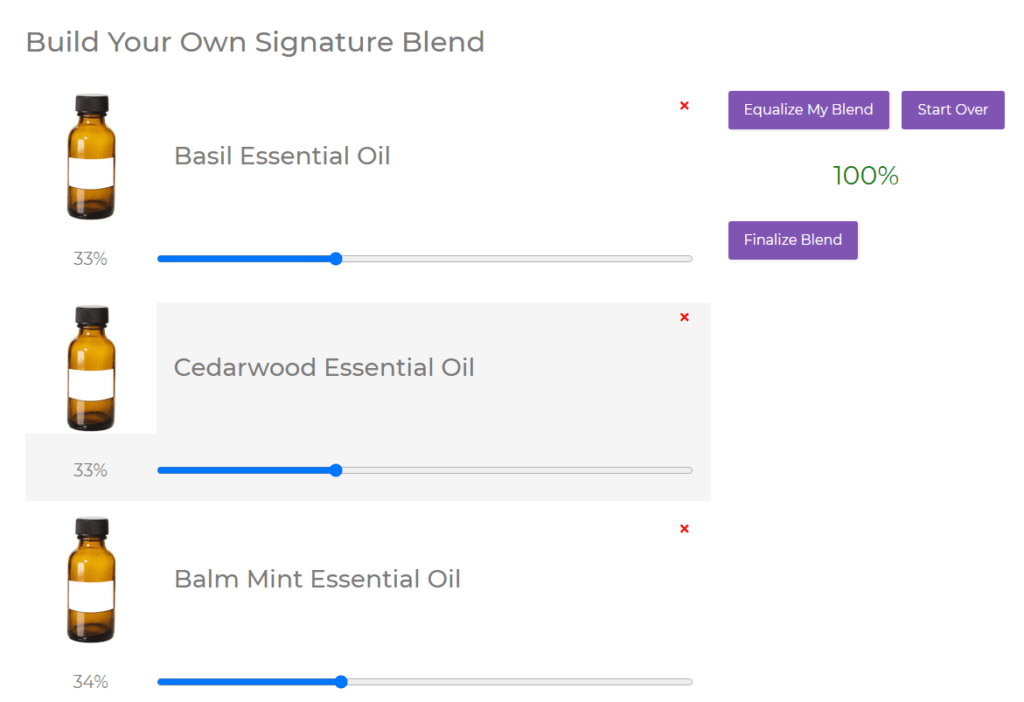
How much of each product will be added to the blend is controlled by the slider positioned beneath the product info.
By default, the quantity of each product is set to roughly equal percentages. As the amounts of each are changed with the slider, the percent on the right updates.
Click Equalize My Blend to reset the quantities of all products in the blend.
Customers can modify the percentages by clicking on the sliders and dragging. When the total percentage adds up to 100, the number on the right will turn green. Otherwise, it will display in red.

Finalize The Custom Product And Purchase:
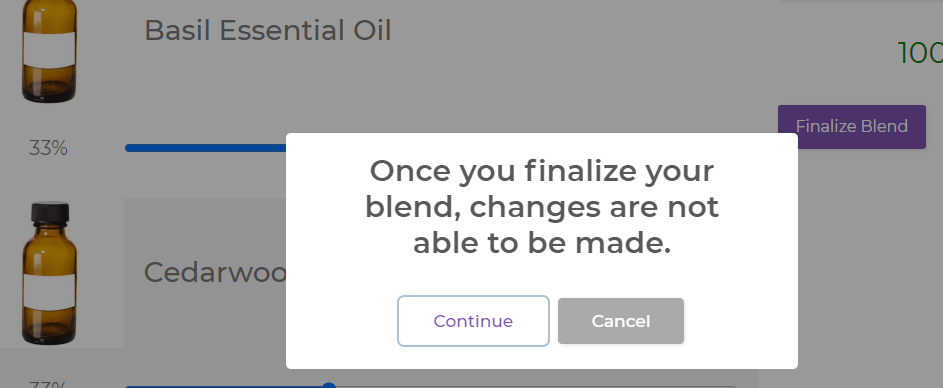
Once all edits to the blended product are complete, customers can click the Finalize Blend button to save it. They will first see a notice that all changes are final. Once they hit Continue, they are redirected to the page for their new product.
From the page for the blended product, the customer can add it to the cart. If subscriptions were enabled in the plugin settings, a subscription version of the custom blend will appear in the related products section of the page.
View And Reorder Blended Products:
The customer can view all of the blended products they’ve created by going to their account page and clicking on My Custom Blends. They can add any of the items to the cart when they need to reorder.


